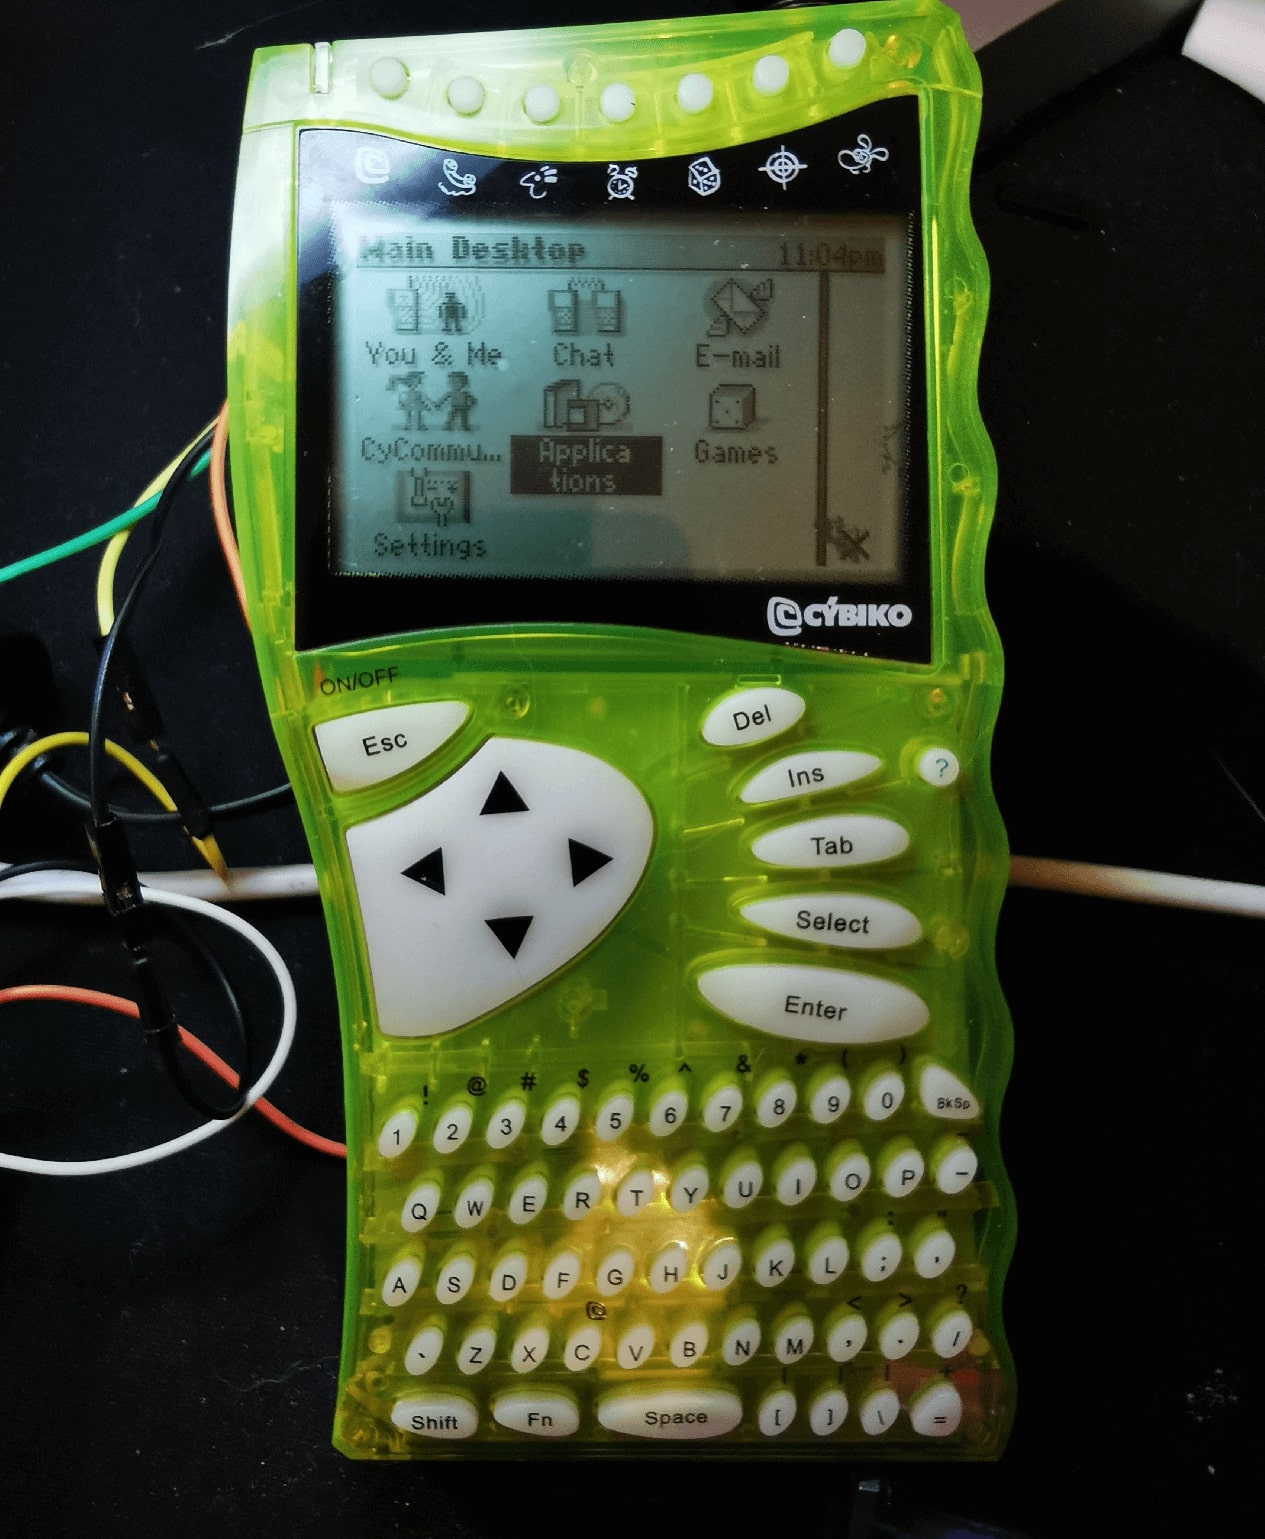
Dealing with a Cybiko Classic in 2022
BE CAREFUL! This post has been marked as potentially dangerous either to health or the devices discussed. You follow this post at your own risk.
Links to purchases in this blog post are affiliate links.
The battery problem
Unfortunately old, long term unused Cybiko Classics suffer from exploded batteries. Worse, the residue will eat away at the original battery contacts, and will even begin to damage the motherboard if left in for long enough.

Get the batteries that are in there out as soon as possible, and clean the battery contacts as well as the Cybikos own contacts as best you can. You may also consider disassembling the Cybiko to clean any residue that may have gotten to the motherboard. Do NOT mess with the LCD, the ribbon is incredibly flexible and I have killed a unit fiddling. You could attempt to reuse the batteries, but I would strongly suggest instead either finding replacements, or as a cheaper and worse alternative doing what I did and attaching an alternative power source. Two Ni-MH 1.2v AAA or AA batteries in a holder soldered to the battery contacts will work just fine. It is also STRONGLY recommended you do NOT solder directly to the batteries, and instead purchase a battery holder instead. Doing a poor job of soldering to the batteries at best can cause irreparable damage to the battery, and at worst can cause a catastrophic failure.
Hardware to connect to Cybiko Classic
If you do not have the serial cable bundled with the Cybiko, you should know that they’re practically impossible to find. If do not mind making a small after-market modification to the Cybiko, you will need to do some soldering work to add some wires, which we will later attach to an RS232 port. This is necessary because Cybiko used a proprietary connector and as far as I can tell no other device used this connector, and therefore the cables are becoming quite rare.
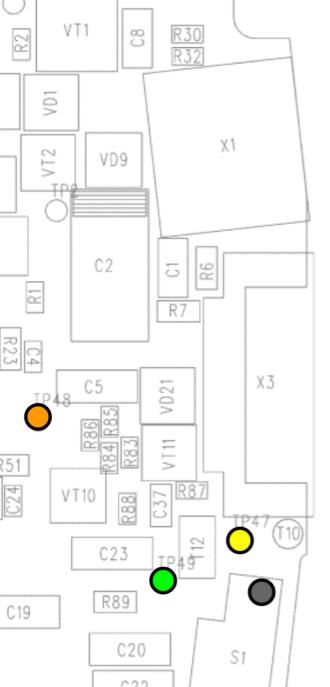
The Cybiko motherboard has a number of test points, and thankfully four of them are exactly what we need to solder to in order to bring the serial connection it uses to connectors we can actually connect to. See the diagram below which highlights each test point. I suggest using the thinnest insulated wire you can get your hands on, in order to make running them inside the Cybiko as easy as possible. One possible egress point for these wires would be the hole on the right hand side of the battery compartment. I also suggest at this point making a note of whichever colour you soldered to each test point, so once you reassemble the Cybiko, you know which is which.

TP47 is TXDL, which goes to the RXD of your RS232 adaptor, TP48 is RXDS, which goes to TXD of your serial adaptor, TP49 is RTS, and the black pin that I’ve stuck on the side of the reset switch is GND, because the outside of the reset switch is grounded, so you can just solder there, or anywhere else you can find ground." title=“TP47 is TXDL, which goes to the RXD of your RS232 adaptor, TP48 is RXDS, which goes to TXD of your serial adaptor, TP49 is RTS, and the black pin that I’ve stuck on the side of the reset switch is GND, because the outside of the reset switch is grounded, so you can just solder there, or anywhere else you can find ground.
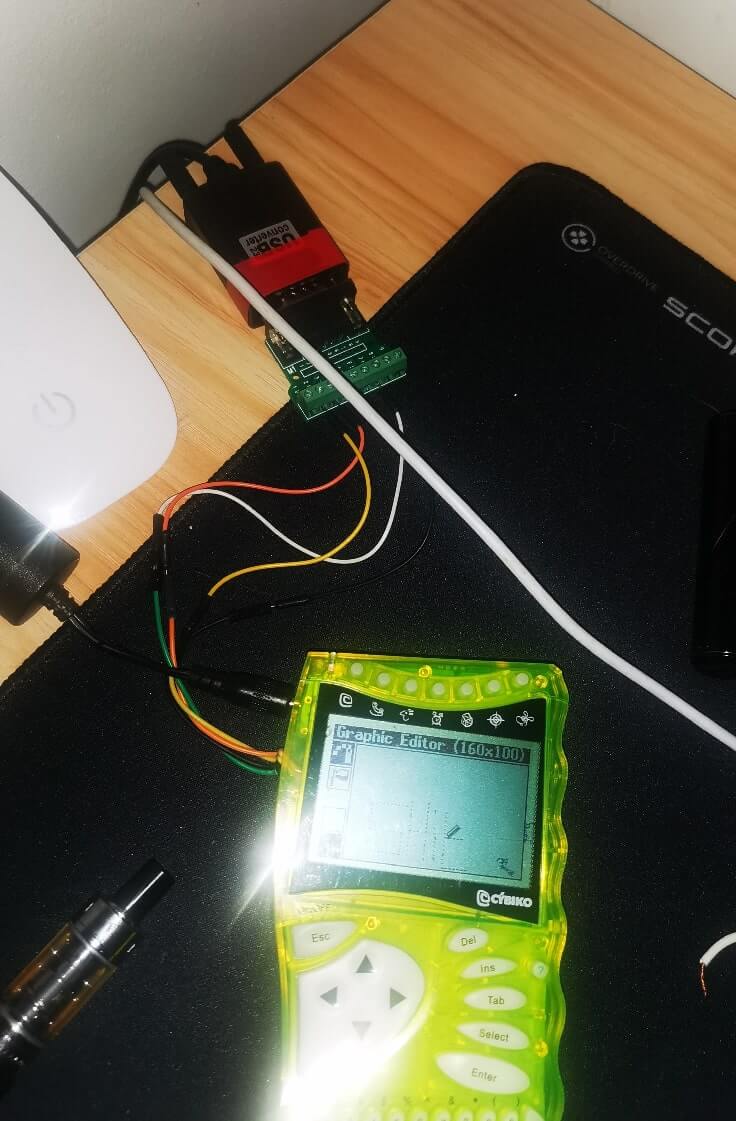
Once the wires are outside of the Cybiko, you can then attach them to an RS232 DB-9 male connector. I suggest picking up a DB-9 break out board, like this one. Attach each of the 4 wires to the 4 points on the DB-9 connector matching TX, RX, RTS, and GND.
If in the very likely case your computer does not have a serial port, you can pick up a DB-9 Male Serial to USB adaptor like this one.
With all this, you’re ready to connect.

If you have a Windows XP computer to hand
A safety note regarding Windows XP: I strongly encourage you to not connect it to the internet if you can help it. It is NOT a secure operating system and should not have unfettered internet access. Copy files you need to and from it via USB sticks or similar.
Plug in your Cybiko via your serial adaptor or similar. If you are using the
official Cybiko cable and are connecting to a real RS232 port on your computer,
you can stop here. If you are using a USB to serial device, you might need to
install its drivers: Open device manager (Start > Run > devmgmt.msc > OK), and
verify that you can see your serial device (It’ll be under Ports (COM & LPT) if
it is installed correctly and no yellow triangle will appear on it). If you find
it under Unknown devices or there is a yellow triangle, you will need to install
the drivers for your serial adaptor. Follow your vendors instructions for how to
do that.
If you do not have a Windows XP computer to hand
One solution to not having a computer of this vintage is to virtualise one. This isn’t too difficult.
-
Plug in your Cybiko via your serial adaptor or similar.
-
Install Virtualbox. It can be gotten from your favourite Linux package manager, or see here for download links for less good operating systems.
-
Acquire installation media for Windows XP. I can’t help you with this one.
-
From within Virtualbox, select the “New” option.
-
Give your virtual machine a descriptive name, and ensure that Type is set to “Windows XP” and Version is set to “Windows XP (32 bit)”. The 32 bit option is important. Ask me how I know.
-
Select whichever RAM size you would like, 1GB or greater recommended.
-
Create the virtual disk with whichever size you like.
-
After the wizard has finished, right click it and select settings. Select USB on the left, and then click the USB Plus (+) icon on the right. A list should pop up listing all your USB devices. One of these should be your serial adaptor. Select it.
Note: If you do not see any USB devices listed, you may be running Linux and
therefore may need to run sudo adduser $USER vboxusers in a terminal in order
to add your user to the Virtualbox users group. If you’re not on Linux, dunno
lol.
-
Select “OK”. Double click your virtual machine.
-
From the popup that appears, select your Windows XP installation media and follow through with the Windows XP installation procedure.
-
Once you are at the desktop, you’ll want to install the Virtualbox Guest Additions. You do this by selecting “Devices” at the top of the Virtualbox window, and selecting “Insert Guest Additions CD”. Then open “My Computer” from within the virtual machine, open the CD that is now there, and select “VBoxWindowsAdditions.exe”.
-
Follow the installation prompts, and reboot when prompted.
-
Open device manager (Start > Run >
devmgmt.msc> OK), and verify that you can see your serial device (It’ll be under Ports (COM & LPT) if it is installed correctly and no yellow triangle will appear on it. If you find it under Unknown devices or there is a yellow triangle, you will need to install the drivers for your serial adaptor. Follow your vendors instructions for how to do that.
Cyberload setup and initial connection
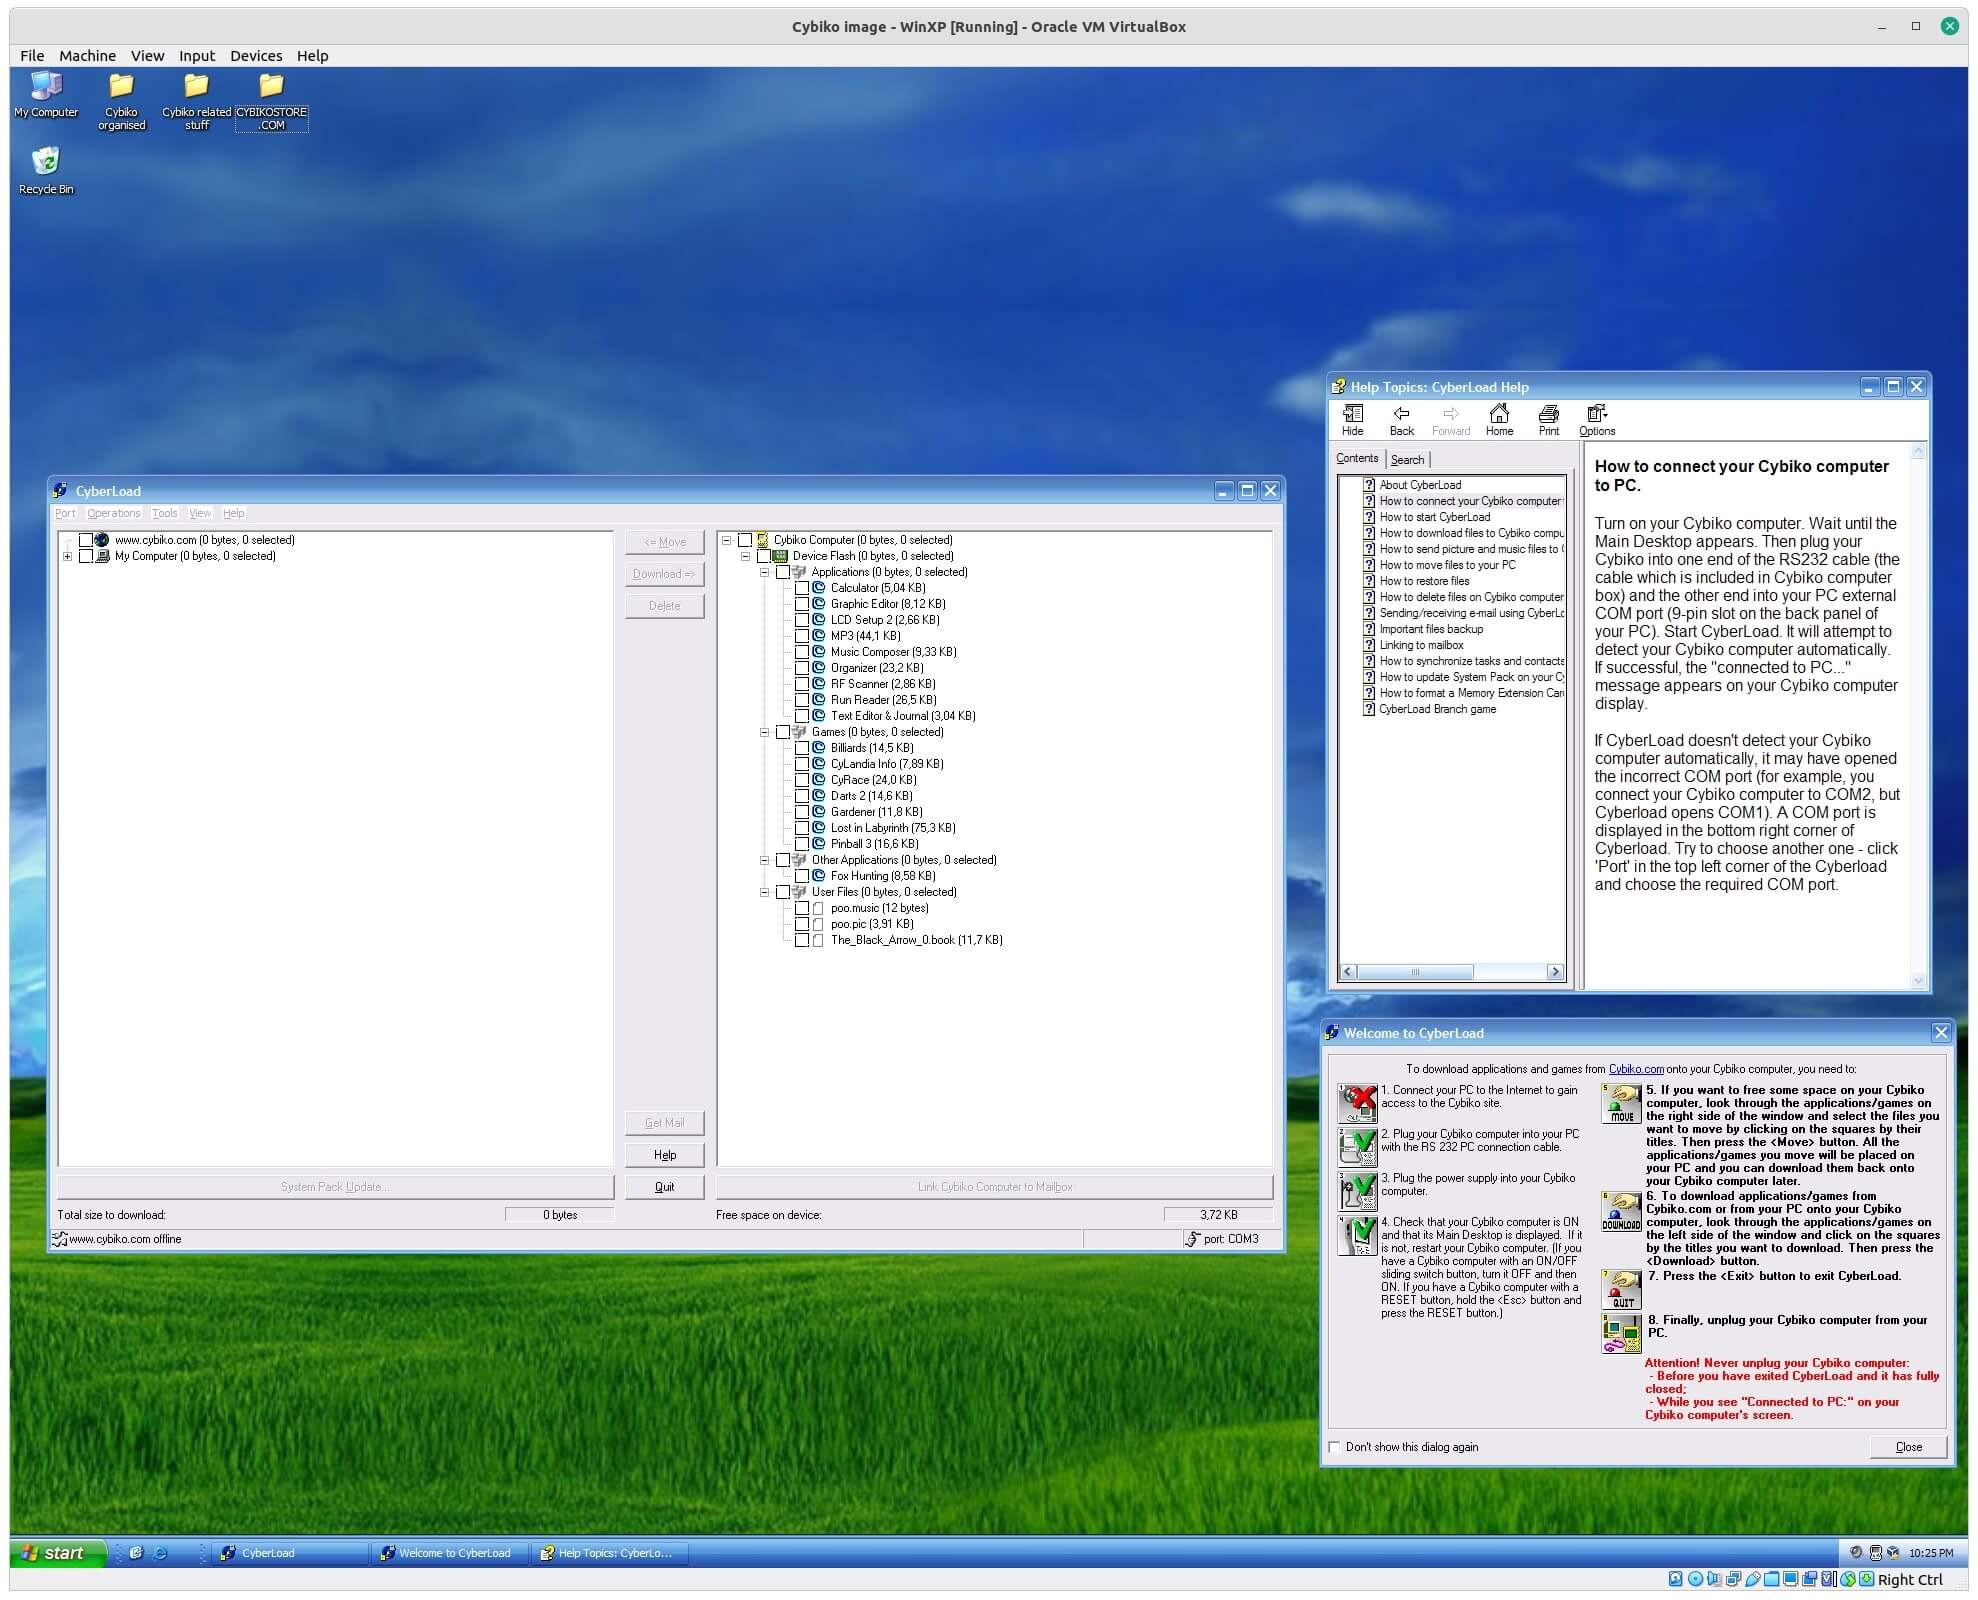
Cyberload is a piece of software released with the Classic. It was superseded by EZ Loader, however I actually prefer Cyberload for Classics. Its purpose was to download the game/app catalogue from Cybiko.com (long gone), and to send games to the Cybiko.

-
Get a copy of the UK Cyberload from here, or the US version of Cyberload from here.
-
After installation, open Cyberload. If it doesn’t pick up on your Cybiko being plugged in, try powering the Cybiko entirely off (hold the escape key for around 10 seconds) and switching it back on while connected to the computer. You’ll know you’re connected once the Cybiko displays “Connected to PC” and the software shows your Cybikos ID on the right hand side. If you cannot get past this step, ensure your connections to your RS232 adaptor are correct!
-
You can now peruse the ‘Help’ section within Cyberload to learn about the various features of Cyberload.
Uploading software
To upload software to the Cybiko that you have found (for example, from here), follow the below instructions. I should also note I built the Cybiko Game Archive which lists every game that was ever released for the Cybiko, along with a description.
-
Counterintuitively, we need to move a file from your Cybiko to your PC, so that Cyberload creates directories on your local machine. To do this, select a file from the right hand side of Cyberload, and then press
<= Move. -
Check
C:\Program Files\Cybiko\CyberLoad\Local Filesand you should now see a folder calledFrom Cybiko Computer XXXXXXXXwhere XXXXXXXX is your Cybiko ID. Inside there will be a folder called Device Flash. Copy your desired software into there. -
Close and reopen Cyberload. The software should now appear on the left, and you can move it using the
movebutton. -
Close Cyberload, and disconnect your Cybiko.
Updating your Cybiko to the latest CYOS
The latest version of CYOS for the Classic is 1.3 System Pack version 57/58. 58
is for the UK, 57 is for the US (this determines which RF profile your Cybiko
uses, since apparently there are different laws between the US and the UK). You
can see which version your Cybiko Classic is running right now by pressing the
? button at the desktop.
If you need to update it or simply would like to factory reset it, the process is relatively simple.
-
Connect your Cybiko to a power source and also your computer.
-
Grab the Cybiko-Autoupdate-UK.exe file here or the US version here
-
Run the update and wait patiently for the update to complete.
Dealing with the Dark LCD problem
There is a problem I have seen with numerous Classic Cybiko units where the LCD becomes almost unreadable with extremely poor contrast. Not entirely black, but only viewable from extreme viewing angles. It seems to me this problem is afflicting many Cybikos. I believe is due to their age, but have no further diagnostic insight sadly.
One solution I came across was to use a piece of Cybiko software I recently came across called LCD Setup 2,
-
Grab LCD Setup 2, which can be downloaded here. Push that to your Cybiko using your preferred method.
-
Run the software on the Cybiko and be careful, the wrong options can result in a white screen, requiring a full software reset to fix.
-
There are 5 values that are configurable here. I suggest firstly moving the cursor to the fifth value (the contrast), and increasing it to something like 11. The other 4 values control the ‘colours’ the cybiko has. For my particular unit, the following values work well (31, 18, 14, 00, 11).
-
Press enter to persist, and then escape out of the app. Enjoy!
Let me know what you thought! Hit me up on Mastodon at @kn100@fosstodon.org.